Profitez d'un tarif d'expédition forfaitaire de seulement 10 $ et de la livraison gratuite pour les commandes de plus de 150 $* lorsque vous réalisez des impressions de vos œuvres d'art et peintures originales avec Posterjack. Commencez dès aujourd'hui !
Que vous soyez un artiste souhaitant reproduire vos peintures originales pour la revente ou que vous cherchiez simplement un moyen de faire une impression de votre œuvre d'art pour l'offrir à un ami ou à un membre de votre famille, vous n'avez pas besoin d'un équipement de numérisation sophistiqué ou de matériel photographique coûteux pour obtenir des impressions de qualité professionnelle.
En fait, en suivant quelques conseils, vous pouvez même obtenir de belles impressions de votre art en utilisant simplement votre smartphone ! Cet article vous apprendra à photographier vos œuvres d'art comme un pro, afin que vos impressions soient absolument incroyables.
Est-il préférable de numériser ou de photographier une œuvre d'art ?
Si vous avez accès à un scanner et que votre œuvre est adaptée à la numérisation, ce sera probablement votre meilleure option, car il sera plus facile de reproduire votre art avec une plus grande précision et vous n'aurez pas à vous soucier de la distorsion, des ombres, du flou d'image ou d'autres problèmes que vous pourriez rencontrer en essayant de photographier une œuvre d'art. Cela dit, la numérisation de votre œuvre peut être difficile, voire impossible, selon le support et la taille. Une œuvre d'art qui a beaucoup de texture et/ou d'embellissements ne se numérisera probablement pas bien car vous perdrez une grande partie de la profondeur et de la dimension de l'œuvre originale. Si la taille de votre œuvre est plus grande que celle du scanner, vous devrez la numériser en plusieurs sections, puis utiliser un logiciel d'édition, comme Photoshop, pour tout assembler. Dans ces cas, photographier votre œuvre d'art pour en faire des impressions pourrait être une meilleure option.
Si vous décidez de numériser vos œuvres d'art pour créer des impressions, voici quelques conseils (initialement partagés dans Comment agrandir de vieilles photos et obtenir des résultats étonnants) :
Selon la marque et le modèle de votre scanner, les étapes exactes que vous suivrez pour numériser votre œuvre d'art varieront, mais il s'agira probablement simplement de placer l'art face vers le bas sur la vitre du scanner et d'appuyer sur le bouton de numérisation. Avant de numériser, cependant, vous devriez vérifier quelques paramètres pour vous assurer d'obtenir la meilleure numérisation pour la création d'impressions de votre œuvre d'art.
Mode couleur : Assurez-vous de numériser en couleur, et non en noir et blanc ou en niveaux de gris.
Résolution (PPP) : Pour la numérisation d'œuvres d'art destinées à l'impression, la résolution doit être réglée à 300 ppp.
Format de données/type de fichier : JPEG
Une fois que vous avez numérisé votre œuvre d'art en utilisant ces paramètres, elle est prête à être imprimée. Tout ce que vous avez à faire maintenant est de télécharger le fichier sur notre site Web et de choisir le produit et la taille souhaités pour votre impression, et nous nous en occuperons !
Article connexe : Préserver les œuvres d'art de vos enfants avec Posterjack
Comment photographier des œuvres d'art pour les imprimer
Si l'utilisation d'un scanner pour reproduire votre œuvre d'art n'est pas une option, vous pouvez toujours obtenir des résultats d'aspect professionnel en photographiant votre œuvre d'art pour l'imprimer.
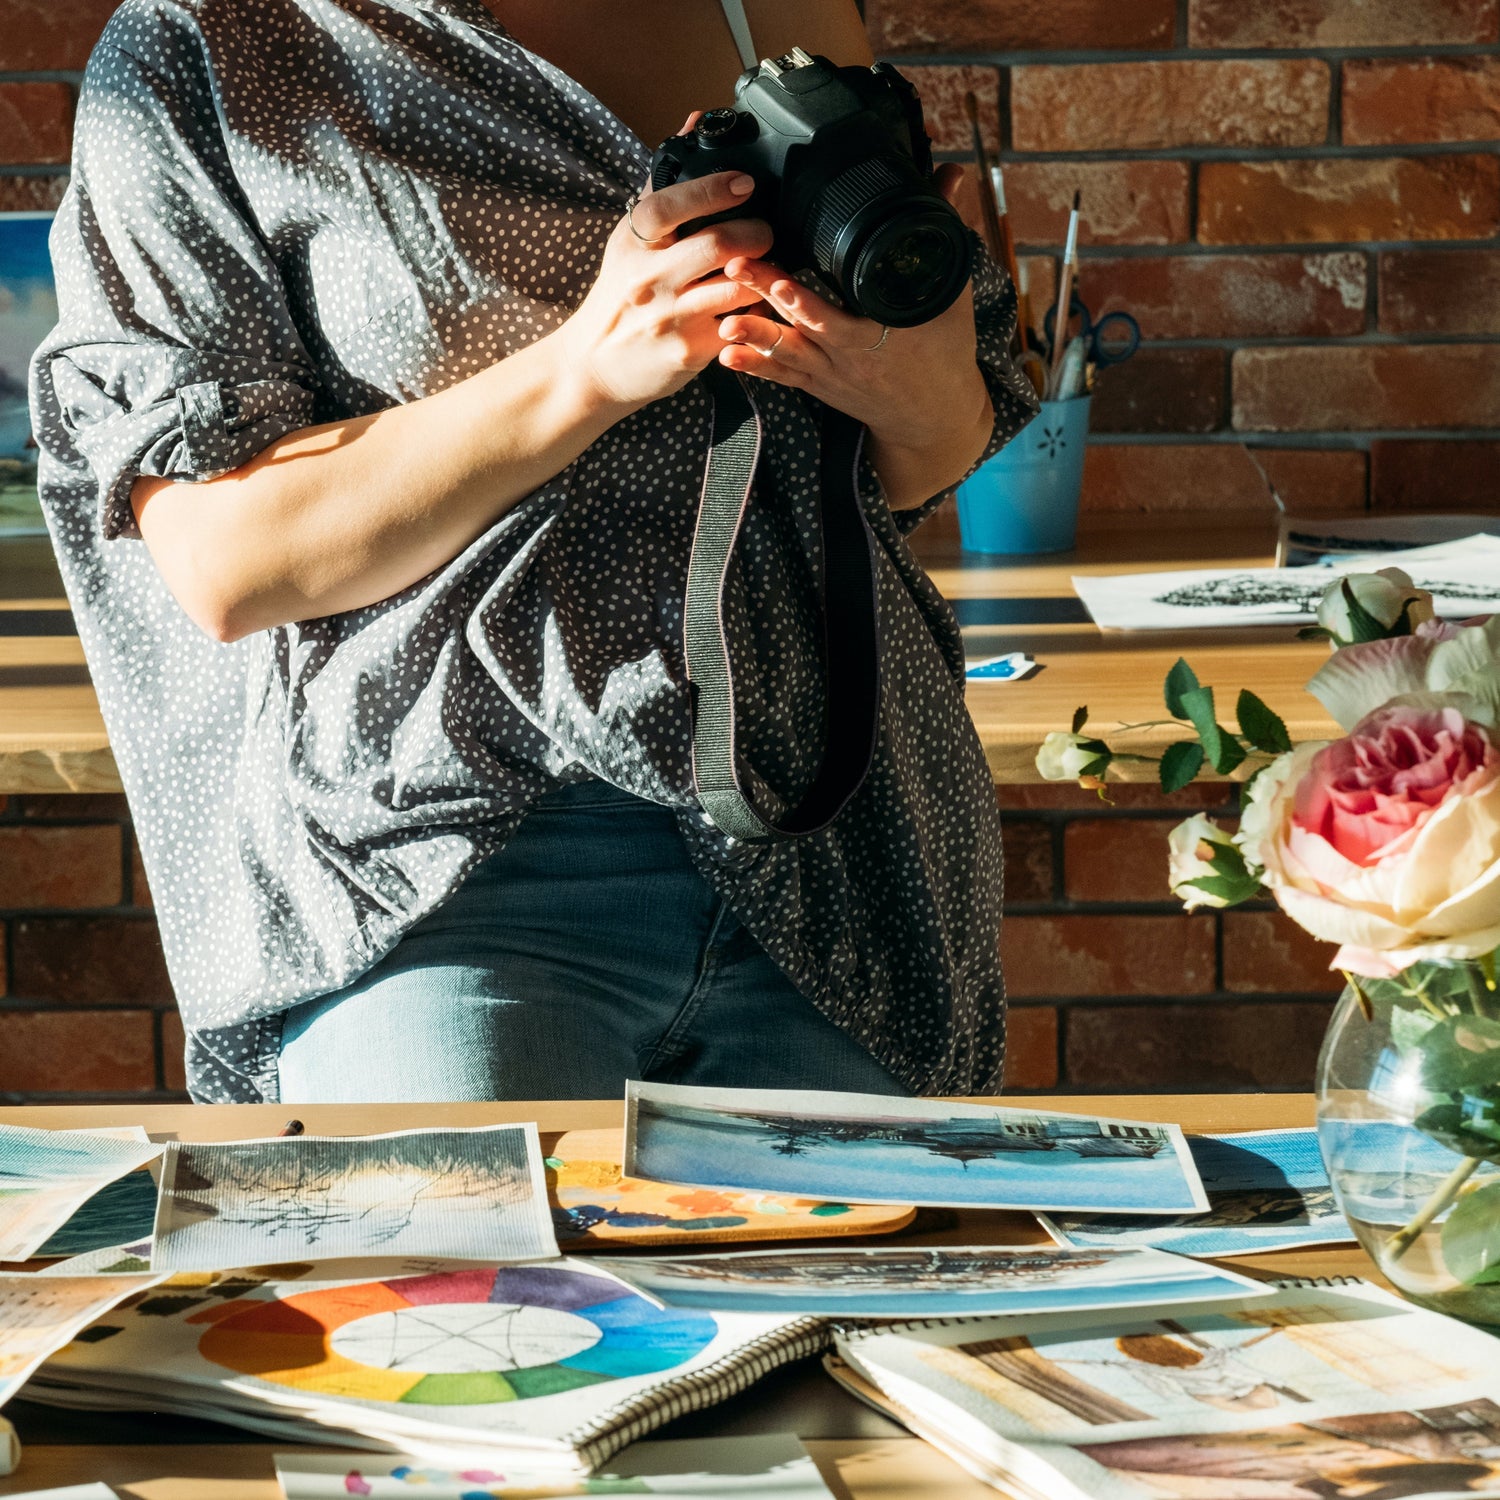
Option 1 : Utiliser un smartphone pour photographier votre art

Idéalement, lorsque vous photographiez vos œuvres d'art pour les imprimer, vous devriez utiliser un appareil photo reflex numérique, car vous aurez plus d'options et de contrôle sur les réglages, et le capteur et l'objectif de l'appareil photo produiront de meilleures images. Cependant, si vous n'avez qu'un smartphone à votre disposition, vous pouvez toujours prendre des photos de vos œuvres d'art qui donneront des impressions fantastiques ! Suivez les conseils d'éclairage et de composition ci-dessous, comme vous le feriez avec un appareil photo reflex numérique, mais si vous utilisez un smartphone, n'oubliez pas de nettoyer l'objectif. Parce que nos téléphones sont constamment dans nos mains, mis et sortis de nos poches, peut-être même manipulés par les petits doigts collants de nos jeunes enfants, l'objectif du téléphone ramasse facilement les empreintes digitales, les huiles et la saleté. Prenez une seconde pour l'essuyer avec un chiffon avant de photographier votre œuvre d'art pour vous assurer d'obtenir l'image la plus nette et la plus claire possible.
Option 2 : Utiliser un appareil photo reflex numérique pour photographier votre art

Comme nous venons de le mentionner, photographier vos œuvres d'art avec un appareil photo reflex numérique est une meilleure option qu'avec un smartphone, car cela produira des images plus nettes et vous aurez plus de contrôle sur vos réglages.
Objectif : Un objectif fixe de 50 mm est idéal pour photographier des œuvres d'art. Si vous devez utiliser un objectif à focale plus courte, essayez d'éviter tout ce qui est inférieur à 24 mm. Photographier avec un objectif grand-angle peut provoquer une distorsion en barillet, ce qui signifie que les lignes droites de votre œuvre apparaîtront courbées sur la photo.
Ouverture : Les images les plus nettes sont produites avec une ouverture réglée entre f/5.6 et f/11. L'utilisation d'une grande ouverture crée une faible profondeur de champ, ce qui n'est pas nécessaire lors de la photographie d'œuvres d'art, et la diffraction de l'objectif réduira la netteté de votre image si vous photographiez à une ouverture bien supérieure à f/11.
Article connexe : Comprendre la profondeur de champ
ISO : Les réglages ISO contrôlent la sensibilité du capteur de votre appareil photo à la lumière. Un ISO élevé permet d'obtenir plus de lumière, ce qui est excellent lorsque vous photographiez dans des conditions de faible luminosité, mais cela se traduit par du bruit et du grain dans l'image - ce que vous ne voulez pas lorsque vous photographiez des œuvres d'art pour en faire des impressions ! Pour obtenir l'image la plus nette possible, réglez l'ISO de votre appareil photo à 100.
Balance des blancs : Lorsque vous prenez des photos de vos œuvres d'art pour créer des impressions, vous voulez que les couleurs de l'image soient aussi proches que possible de l'art original. L'ajustement des paramètres de balance des blancs de votre appareil photo y contribuera de manière significative, car il indique à votre appareil photo quelles sources de lumière sont utilisées et ajustera les températures de couleur en conséquence. Si vous ne savez pas quel réglage choisir, n'hésitez pas à expérimenter et à en essayer plusieurs ! Vous pouvez également ajuster la balance des blancs à l'aide d'un logiciel de retouche photo par la suite.
Configuration de votre éclairage en 5 étapes
Un équipement spécialisé, comme les boîtes à lumière et les filtres polarisants, peut faciliter la photographie de vos œuvres d'art, mais vous pouvez vous en passer et obtenir néanmoins d'excellents résultats. En fait, vous pouvez photographier avec succès vos œuvres d'art sans lumières de studio ni trépied, mais nous y reviendrons dans un instant.
Pour une séance photo en intérieur, vous aurez besoin de :
- Un trépied
- Deux lumières vives et identiques
- Un mur pour accrocher votre œuvre d'art
- Un mètre-ruban
Facultatif, mais utile :
- Deux draps blancs (ou quelque chose de similaire pour diffuser chaque lumière)
- Déclencheur d'appareil photo à distance
- Une feuille de papier blanc
- Un niveau
Étape 1 : Si votre œuvre d'art est encadrée, vous devrez la retirer afin d'éviter les reflets et les éblouissements. De même, si vous prévoyez de vernir votre œuvre d'art originale, photographiez-la avant de le faire si possible.
Étape 2 : Accrochez votre œuvre d'art à plat sur le mur. En supposant que votre œuvre ne soit pas trop lourde, une punaise devrait faire l'affaire, car elle ne restera pas là longtemps. Si vous avez un niveau, vérifiez qu'elle est bien droite. Si vous comptez modifier votre image plus tard pour ajuster ses couleurs et sa balance des blancs, envisagez d'accrocher votre œuvre d'art contre un mur blanc pur ou simplement d'accrocher une feuille de papier blanc directement à côté de votre art (elle sera recadrée plus tard). Cela vous permettra d'utiliser l'outil pipette de votre logiciel d'édition pour ajuster la balance des blancs plus tard.
Étape 3 : Placez votre appareil photo sur un trépied à une distance de l'œuvre d'art qui vous permet de remplir le cadre de l'appareil photo sans avoir besoin de zoomer optiquement ou numériquement. Lorsque vous composez la prise de vue, bien que vous vouliez remplir votre cadre, ne le faites pas trop serré – si vous incluez environ un pouce de l'arrière-plan derrière votre œuvre d'art, cela facilitera un peu l'édition de votre photo plus tard, car vous pourrez faire pivoter/redresser la prise de vue sans qu'aucune partie de l'œuvre d'art ne soit recadrée dans le processus.
Étape 4 : Lors du positionnement de votre appareil photo, il est très important que l'objectif de l'appareil soit parallèle à l'œuvre d'art et que l'objectif de l'appareil photo et le centre de l'œuvre d'art soient à la même hauteur. Utilisez un mètre ruban pour mesurer la distance du sol au centre de l'œuvre d'art, puis ajustez la hauteur de votre appareil photo pour qu'elle soit la même. Si la hauteur n'est pas la même ou si l'appareil photo est incliné par rapport à l'œuvre d'art, votre photo de l'œuvre d'art sera déformée.

Étape 5 : Une fois votre œuvre d'art et votre appareil photo installés, vous pouvez positionner vos lumières. Vous voulez qu'elles soient dirigées vers votre œuvre d'art et à un angle de 45º de chaque côté de l'appareil photo. Bien que vos lumières doivent être brillantes, vous obtiendrez de meilleurs résultats si vous pouvez diffuser l'éclairage. Vous pouvez le faire simplement en accrochant un drap blanc devant chaque lumière. Si vous n'avez pas de draps blancs, vous pouvez expérimenter avec d'autres objets blancs semi-transparents que vous pouvez trouver dans la maison, comme des t-shirts, du papier sulfurisé ou ciré, des sacs poubelles blancs, ou même du papier d'imprimante.

Important : Les lumières peuvent devenir chaudes et le matériau que vous utilisez peut être inflammable, alors soyez prudent de ne pas installer vos diffuseurs là où ils pourraient prendre feu !
Conseils pour photographier l'œuvre
- Si vous photographiez en intérieur avec un réglage ISO de 100 sur votre appareil, celui-ci a besoin de plus de lumière externe pour prendre de bonnes photos. Utilisez les lumières les plus brillantes possible (avec un diffuseur). Laisser entrer plus de lumière dans le capteur de votre appareil photo produira une image de meilleure qualité et plus nette.
- Pour obtenir des images aussi nettes que possible, il est important de maintenir votre appareil photo aussi stable que possible. Si vous n'avez pas de trépied, placez votre appareil photo sur une table. Vous pouvez également empiler des livres sur la table pour ajuster votre appareil photo à la bonne hauteur.
- Appuyer sur le bouton de l'obturateur de votre appareil photo peut même vous faire perdre de la netteté sur votre photo. Utilisez un déclencheur à distance si vous en avez un, ou réglez le minuteur de votre appareil photo afin de ne pas avoir à appuyer manuellement sur le bouton de l'obturateur.
- N'utilisez pas le flash de votre appareil photo.
- Si vous n'avez pas de lumières à utiliser comme dans la configuration ci-dessus, vous pouvez photographier votre œuvre avec succès à l'extérieur en utilisant la lumière naturelle ! Une journée nuageuse est la meilleure, car les nuages diffusent naturellement la lumière. À défaut, lorsque vous photographiez en extérieur, trouvez une zone ombragée sur le côté de votre maison ou d'une autre grande structure. Vous voulez éviter la lumière directe et dure du soleil, car elle projetterait des ombres sur votre œuvre.

Conseils pour retoucher vos photos d'œuvres d'art avant l'impression
Lors de la retouche des photos de vos œuvres d'art, voici quelques étapes de post-traitement que vous pouvez envisager :
Redressement : Si nécessaire, faites pivoter votre image afin qu'elle soit parfaitement droite. C'est pourquoi nous vous avons recommandé d'inclure environ un pouce d'arrière-plan derrière votre œuvre d'art lors de la composition de votre cliché. Faire pivoter l'image numériquement sans cet espace supplémentaire couperait une partie de l'œuvre d'art.
Recadrage : Une fois que vous avez ajusté votre photo pour qu'elle soit droite, vous pouvez la recadrer pour supprimer l'arrière-plan. Vous ne voulez voir rien d'autre que votre chef-d'œuvre dans l'image lorsque vous créez des impressions de qualité professionnelle de votre œuvre d'art originale !
Correction des couleurs : Vous pouvez ajuster la balance des blancs, le contraste, la luminosité et la netteté de votre image, mais n'en faites pas trop ! Vous voulez que votre image soit aussi proche que possible de l'œuvre d'art originale.
Création d'impressions de vos œuvres d'art
Maintenant que vous avez créé des copies numériques de votre œuvre d'art originale, il est temps de passer à la partie amusante : la création d'impressions ! Nous proposons une grande variété de produits d'art photographique, mais en voici quelques-uns qui sont populaires auprès des artistes et qui valent la peine d'être considérés.

Les Tirages d'art Posterjack sont réalisés avec du papier Hahnemuehle Photo Rag 100 % coton de 308 g/m², l'un des meilleurs papiers d'art au monde. En utilisant la méthode giclée (jet d'encre), nous employons des encres HP Vivera non toxiques et respectueuses de l'environnement ainsi que des logiciels d'impression propriétaires, afin que vos tirages soient éclatants et magnifiques. Ils sont également évalués comme étant résistants à la décoloration pendant plus de 200 ans ! Ils sont disponibles dans plus de 40 tailles différentes, et vous pouvez même les faire encadrer sur mesure dans l'un des six styles de cadres différents. Si vous envisagez d'imprimer votre œuvre sur quelque chose comme de la toile, du métal ou de l'acrylique, mais que vous souhaitez d'abord imprimer un échantillon pour vous assurer que vous êtes satisfait de la photo de votre œuvre d'art, les Tirages d'art sont également parfaits à cet effet.
Une impression acrylique Posterjack est une œuvre d'art photographique personnalisée réalisée avec des matériaux de première qualité. Depuis notre atelier de Toronto, nous imprimons votre photo directement sur du verre acrylique optiquement clair de 1/4 de pouce d'épaisseur en utilisant la méthode giclée. Une fois votre photo imprimée sur l'acrylique, nos experts en art photographique la montent sur une feuille de support protectrice blanche, puis la finissent en polissant les bords pour un éclat cristallin. C'est notre produit phare, et pour une bonne raison ! Découvrez Qu'est-ce qu'une impression acrylique pour en savoir plus.

Bien que nous proposions trois types d'impressions sur métal différentes, chacune ayant ses propres caractéristiques uniques, nos impressions sur métal blanc mat sont une option populaire pour l'impression d'œuvres d'art en raison de leur finition mate satinée. Elles sont parfaites pour être exposées dans presque toutes les situations, y compris les pièces avec des lumières vives ou un éclairage zénithal. Elles sont évaluées comme étant résistantes à la décoloration pendant plus de 200 ans, et sont imprimées à l'aide d'équipements d'impression SwissQ avancés pour une qualité d'image supérieure. Votre œuvre sera imprimée sur un panneau d'aluminium revêtu de blanc de 3 mm et vous pouvez choisir l'une des quatre options de suspension — Fixation flottante, Kit d'écartement, Cadre flottant moderne ou Cadre standard — des options sans suspension/encadrement sont également disponibles.
Article connexe : Tout ce que vous devez savoir sur les impressions sur métal
Les toiles imprimées Posterjack sont tendues à la main par des experts et fabriquées ici même au Canada, depuis notre site de Toronto. Notre objectif est d'offrir aux Canadiens les meilleures toiles imprimées disponibles, ce qui signifie que nous n'utilisons que des matériaux de première qualité, comme une toile épaisse en polycoton qui ne s'affaissera pas, et des cadres en tilleul canadien séchés au four qui ne se déformeront pas. En plus de nous assurer que les matériaux que nous utilisons sont inégalés, nous mettons autant d'efforts à ce que votre œuvre d'art soit la plus belle possible ! Nous imprimons des photos à l'aide de notre logiciel propriétaire PJ-PRINT™ et d'imprimantes de classe mondiale utilisant des encres HP certifiées vertes qui ne se décoloreront pas pendant 200 ans. La qualité et le soin que nous apportons à la création de nos toiles imprimées signifient que vous obtenez une magnifique œuvre d'art personnalisée que vous pourrez fièrement exposer sur votre mur et que, des années plus tard, elle sera aussi vibrante que le jour où vous l'avez reçue.

Si vous n'arrivez pas à décider sur quoi imprimer votre œuvre d'art, vous pouvez commander une boîte d'échantillons, qui comprend une variété de matériaux sur lesquels nous imprimons, ainsi qu'un certificat-cadeau de 10 $ à utiliser sur votre prochaine commande.

